Service Quick Start Guide

- Accepting an invite
- Signing up
- Communicating with notes
- Accepting and scheduling work
- Completing service calls from the field
- Completing service calls from the office
- Submitting a proposal
- Submitting an invoice
- Understanding invoice statuses
- Updating your company's profile
- Getting additional support
1. How to accept an OpenWrench invite
You will receive an invitation via email to sign up

It will list the locations that the customer has indicated you are able to service and the associated problem types. At the bottom will be a link to take you to your company profile.
It is important that you use this invitation link and not create a duplicate account at partners.useopenwrench.com. If the customer has incorrect info – no worries! You are easily able to change it once you register.
2. How to sign up for an account in 3 easy steps

- Type in your name.
- Your email address will be pre-filled based on where your invite was sent. This will be your username going forward.
- Set your password (there are NO specific requirements). Click REGISTER.
3. How to accept and schedule a service request
You will get an email to the addresses that you have specified. You can accept, decline, or view the work order right from the bottom of the email.

There are a couple ways to accept the work, either on the right side of the screen or by clicking on the work order field to get into the overview screen and accepting on the top right.
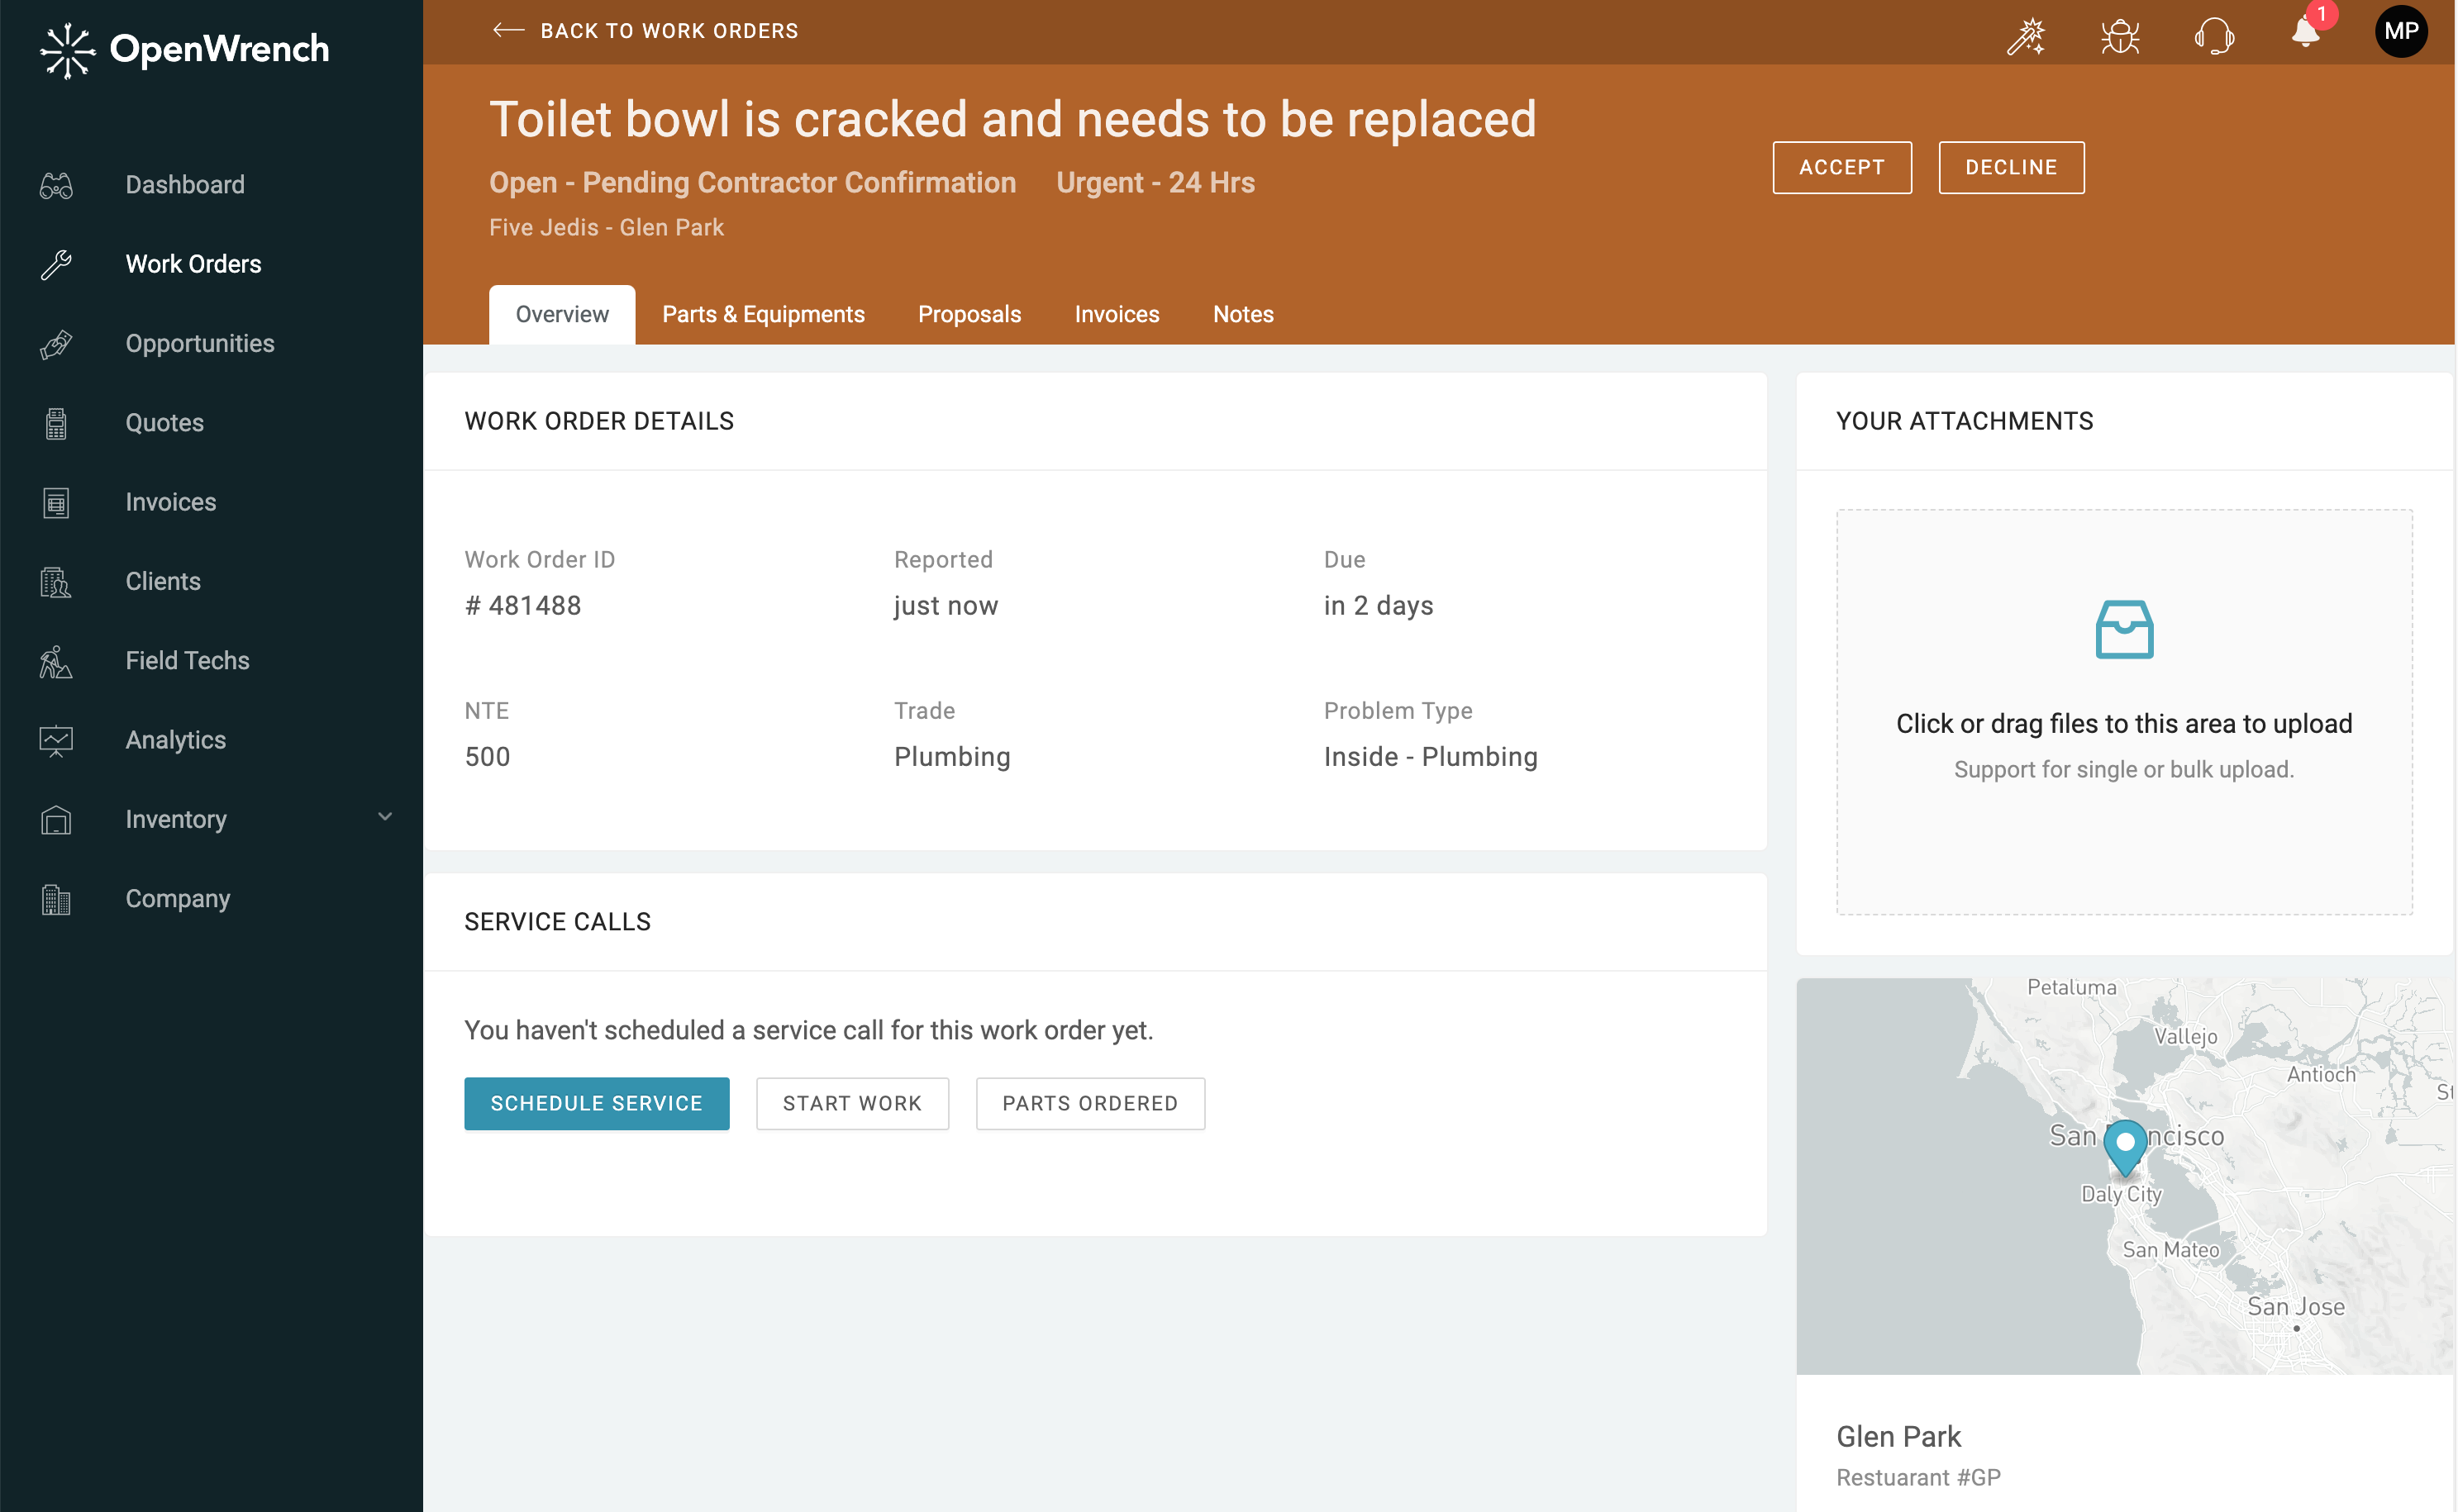
You can also accept the work order by selecting SCHEDULE SERVICE and inputting your ETA. Once you accept and schedule the work, a notification is sent to the customer via email and in the app. They are now aware of your ETA and acceptance.
4. How to communicate with notes
You will want to get very comfortable with the notes section, where your team and the customer's team can communicate about the work order. You can request more details on the problem and add pictures, videos, or start a video call in this section on the bottom left of the notes field. If you need to add other users, field techs, or someone from the customers location to the chat, click on the users on the right side of the screen and ADD PEOPLE to the chat. It’s really a handy feature and is very easy to use!


5. How to check in and out on mobile
Login to the OpenWrench Service Manager App.

From the dashboard, tap on the “work” icon at the bottom and scroll to the work order you will be checking into. Once you tap on the work order you will see the button to SCHEDULE WORK, START WORK, or CHECK IN.

To check in, you will need to be at the actual location specified in the work order. When you do this for the first time, your phone will ask you to give the app permission to use your locations data. Click allow to proceed. Once you have successfully checked in you will be able to add notes, attachments, and communicate with the customer – all through the app!

Check out just as you have checked in on the Overview tab. You will have the opportunity to select if the work is completed, parts are needed, or a quote is required when checking out.

Once you have checked out and noted that the work is complete, the status is moved to “In Progress – Waiting for Review”. A notification has been sent to the customer to approve the work that was performed. Once approved, the status is moved to “Completed”.

6. How to check in and out on desktop

Login to your company account at partners.useopenwrench.com. The REMOTE CHECK IN and REMOTE CHECK OUT feature allows someone offsite to check in and out and indicate the times a tech was onsite. Navigate to the work order you would like to check in and out of and click on it. You will land on the Overview tab. Scroll down to REMOTE CHECK IN and enter the time onsite, add photos (not required), notes, and select CHECK IN.

Checking out is similar. You will have the opportunity to select if the work is completed, parts are needed, or a quote is needed when checking out. If parts or a quote are needed, the work order will move into an “on hold” status and you will be able to schedule another service call. Once you have checked out and noted that the work is complete, the status is moved to “In Progress – Waiting for Review”. A notification has been sent to the customer to approve the work that was performed. Once approved, the status is moved to “Completed”.

7. Uploading proposals
The customer will have a specified Not to Exceed amount that will be listed on the work order notification email and on the Overview tab. If repairs will be over that amount, hop over to the Proposals tab of the work order and select CREATE A QUOTE. Fill in the fields with your proposal information.

If you have a detailed PDF that you would like the customer to review, you can be brief here and note that you will upload the Quote PDF. Scroll down the page and select CREATE PROPOSAL. You will see that you are now able to “upload quote” to the right of the screen. Grab your PDF and simply attach!
8. Uploading an invoice
Once you are ready to upload your invoice, you can navigate to the work order by searching for the work order number in the search bar located under the work orders screen. Or by scrolling down to “Completed work orders not invoiced” on your dashboard.

*Please note – you will never want to upload your invoice as a file attachment on the work order. The attachments box is great for other files or pictures related to the work you would like to share with the customer, but it is not where you should upload your invoice.
Invoices tab. There are 2 options under the invoices tab CREATE INVOICE or UPLOAD INVOICE PDF. If you have a PDF that you have already created - perfect! You will never select CREATE INVOICE. Always select UPLOAD INVOICE PDF.

Total: Type in your total invoice amount including tax Invoice #: Type in your invoice number Work Order #: The work order number auto populates – nothing else to do here. What are you billing for: Briefly describe what you are billing for if it is described in detail on your PDF. Select CREATE INVOICE.

Uploading an invoice (cont.): The next screen will be where you select the appropriate PDF from your computer files. Click on CLICK TO UPLOAD INVOICE FILE. Once selected, your PDF will attach. After attached, click on GO TO INVOICE. Make sure that everything looks correct and select PUBLISH INVOICE.
*Occasionally, an invoice may move into a “draft” status and is not able to be published. You may need to check in and out of the work order and indicate it is complete. If the customer has not approved the work, you can go to the NOTES tab and ask the customer to approve the work. After 7 days, whether the customer has approved the work or not, the status will change to “reviewed and completed” and you will be able to publish your invoice.
9. Understanding invoice statuses
The Invoices tab on the left of the screen is where you can track the status of your invoices, not where you will upload them. Invoice statuses are also able to be filtered on this screen.

- Draft – These invoices have been uploaded but are not visible to the customer yet. You can publish them from this screen when they are able to be published. Simply click in the check box to the left of the invoice information and select PUBLISH.
- Pending – these invoices have been published and are awaiting managers’ approval to send to Accounts Payable.
- Disputed – there was a discrepancy with the invoice and the manager has not approved the invoice. Please reach out to the customer directly or in the notes section.
- Approved – the invoice was approved. Invoices are sent to their Accounts Payable team in different ways depending on the customer.
- Processing – the invoice is being processed for payment.
- Paid – the customer will note when it has been paid so you are aware that payment will arrive very soon!
10. How to add and remove users
You will need to be an Admin on your account to add users. There will be an Admin tab at the bottom left of the screen. To add a user, click on ADD NEW USER in the top right and a box will appear to add the user.

If you add an Admin, Manager, or User they will automatically be assigned to all customer locations. If you are adding Field Tech, you will need to make sure you assign them to the locations that they are available to work at. Field Techs only have permissions to check in and out on work orders and add notes. As an Admin, you can EDIT roles, change passwords, and DISABLE user accounts. Please reach out to support@useopenwrench.com if you are not an Admin on your account and feel that you should be.
11. Updating your company's profile
It is important to make sure your company information is updated. If there is an emergency work request, we advise all customers to call the supplier, as some email boxes are not monitored on nights and weekends. You can add phone numbers, company information, W9, certifications and so much more!

Click on the company tab and check it out!
12. How to get more support
We have Zoom training/demo sessions every Monday and Friday at 12:30 PM CST. You can sign up here. Join us to see a live demo of all this information. It is also a good time to ask detailed questions about the additional functions and features of OpenWrench!

You can also use the icon buttons in the top right corner of the website to request features, report bugs, and chat with our support live.
